


Itinerary
- Day 1
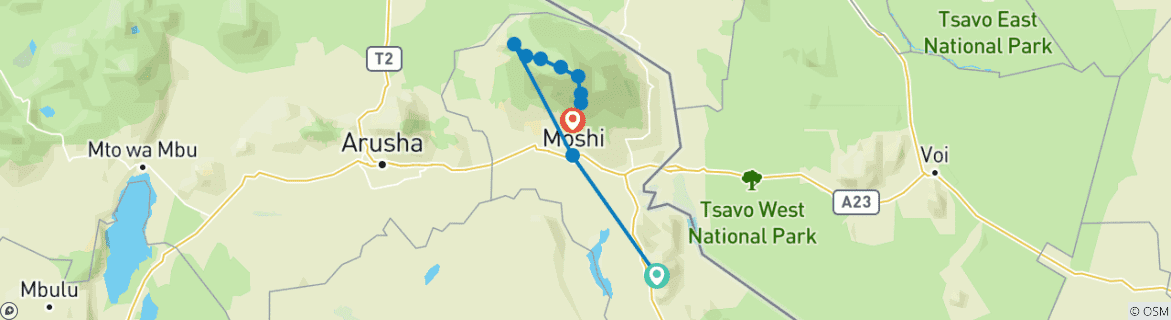
Kilimanjaro International Airport to Moshi
You'll arrive at Kilimanjaro International Airport and get transferred to your hotel in Moshi. Your guide will meet you there to go over what's ahead and check your gear, so if anything's missing, you can pick it up today.
Included Activities
- Meet guide and trek briefing
- Equipment check
Optional Activities
- Rent missing mountain gear
Landmarks Kilimanjaro International Airport 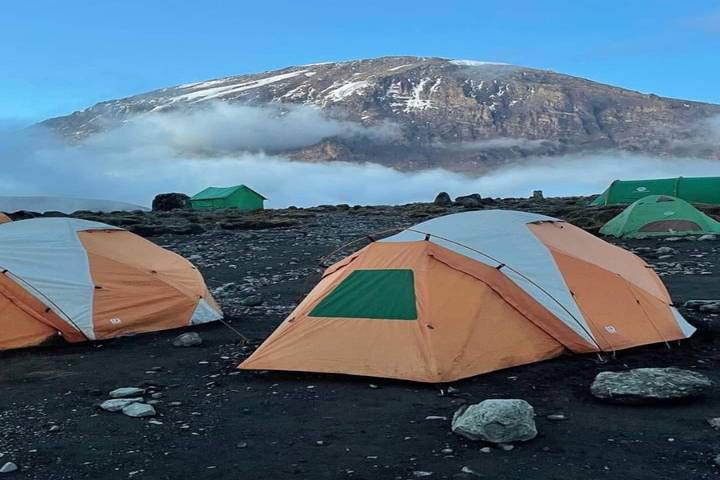

- Day 2
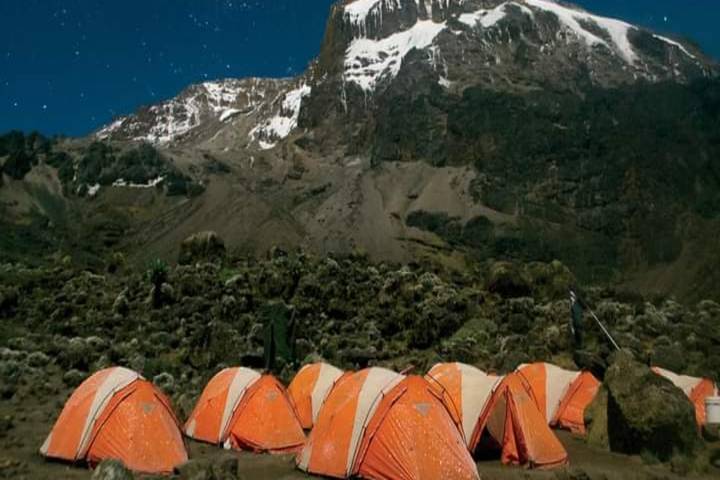
Londorossi Gate to Mti Mkubwa Camp
It's about a two-hour drive from Moshi to Londorossi Gate at 2,100m. After registering with the park authorities, you'll head to the trailhead and have lunch before starting toward Mti Mkubwa Camp (2,820m). Keep an eye out for elephants and buffalo coming out of the rainforest. Dinner happens at camp.
- Meals
- Lunch, Dinner
Included Activities
- Park registration at Londorossi Gate
- Trekking to Mti Mkubwa Camp
- Wildlife viewing opportunity
Landmarks Londorossi Gate Mti Mkubwa Camp - Day 3
Mti Mkubwa Camp to Shira Camp 1
The first hour takes you through rainforest, then you'll transition into moorland that leads to the Shira Plateau. This is a shorter, more gradual day, finishing at Shira Camp 1 (3,610m).
- Meals
- Breakfast, Lunch, Dinner
Included Activities
- Trekking through rainforest
- Transition to moorland zone
- Trek to Shira Camp 1
Landmarks Shira Plateau Shira Camp 1 - Day 4
Shira Camp 1 to Shira Camp 2
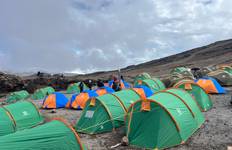
You'll trek across the Shira Plateau from Shira Camp 1 to Shira Camp 2 (3,610m). If you're doing the nine-day option, other trekkers from the Machame Route will join you here. There's an optional hike to higher plateau areas if you want views of the valley and Western Breach. Nights get cold—temperatures drop well below freezing.
- Meals
- Breakfast, Lunch, Dinner
Included Activities
- Trekking across Shira Plateau to Shira Camp 2
Optional Activities
- Trek higher up plateau for valley views and Western Breach views
Landmarks Shira Plateau Western Breach Shira Camp 2 - Day 5
Shira Camp 2 to Moir Camp
A longer trek takes you east through the Garden of the Senecios into high alpine desert. You'll climb to Lava Tower and Shark's Tooth (4,600m) for lunch. After eating, you join the northern circuit descending to Moir Camp (4,200m). This is key for acclimatization—you go high but sleep lower.
- Meals
- Breakfast, Lunch (Lunch at Lava Tower and Shark's Tooth), Dinner
Included Activities
- Trekking through Garden of the Senecios
- Trek to Lava Tower and Shark's Tooth rock formation
- Trek to Moir Camp
Landmarks Garden of the Senecios Lava Tower Shark's Tooth rock formation Moir Camp - Day 6
Moir Camp to Buffalo Camp
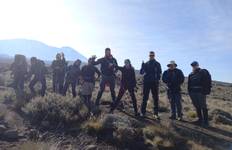
Starting with a moderately steep climb out of Moir Valley, there's an optional detour to Little Lent Hill (4,375m). Then you'll navigate up and down inclines along Kibo's northern slopes to Buffalo Camp (4,020m). The views stretch north across the plains toward the Kenya-Tanzania border. You'll arrive mid-day with time for lunch and rest.
- Meals
- Breakfast, Lunch, Dinner
Included Activities
- Climb out of Moir Valley
- Trek around northern slopes of Kibo to Buffalo Camp
Optional Activities
- Climb summit of Little Lent Hill (4,375m)
Landmarks Moir Valley Little Lent Hill Kibo Buffalo Camp - Day 7
Buffalo Camp to Rongai Third Cave
After climbing Buffalo ridge and descending into Porfu Camp for lunch, you continue east around the northern slopes to Rongai Third Cave (3,800m). This shorter day means your body should be handling the altitude well. You'll get there mid-afternoon.
- Meals
- Breakfast, Lunch, Dinner
Included Activities
- Climb Buffalo ridge
- Trek to Porfu Camp
- Trek around northern slopes to Rongai Third Cave
Landmarks Buffalo ridge Porfu Camp Rongai Third Cave - Day 8
Rongai Third Cave to School Hut
A steady incline takes you over the Saddle between Kibo and Mawenzi peaks, then south-west to School Hut (4,800m). You'll eat an early dinner, then pack everything you'll need—warm layers, insulated bottles, snacks, headlamp, camera—because you'll wake up before midnight for the summit push.
- Meals
- Breakfast, Lunch, Dinner (Early dinner)
Included Activities
- Trek over the Saddle between Kibo and Mawenzi Peak
- Trek to School Hut
Landmarks Saddle Kibo Mawenzi Peak School Hut - Day 9
School Hut to Millennium Camp
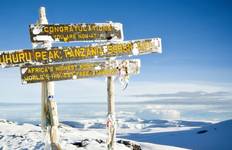
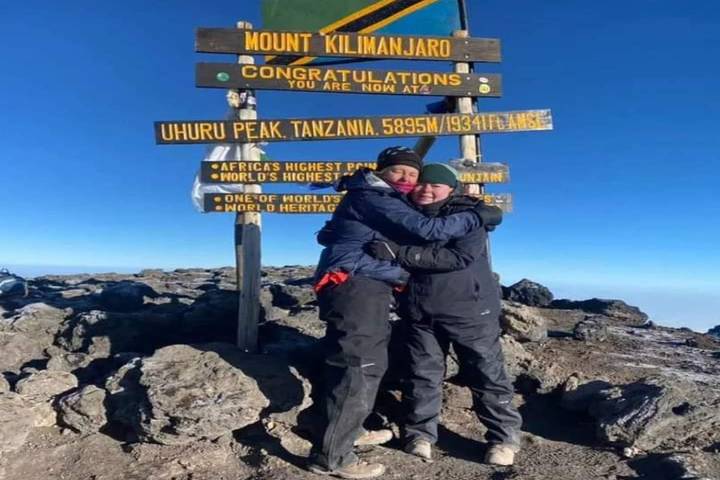
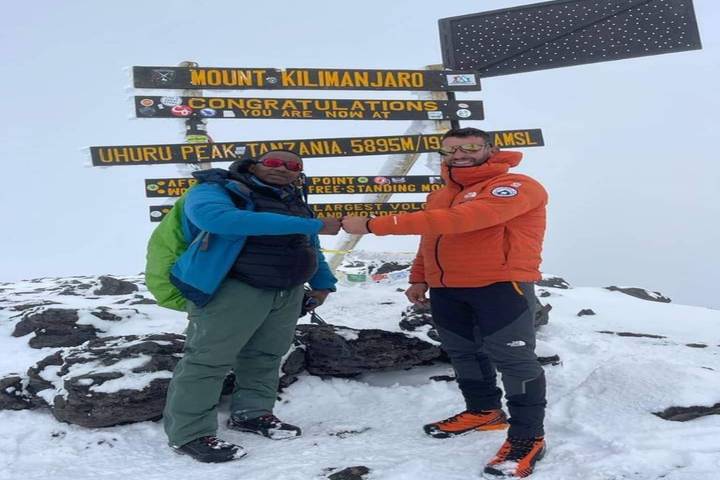
Around 11:30 PM you'll get hot tea and biscuits before heading up Kibo's slopes in the dark. You'll pass Hans Meyer Cave and reach Gilman's Point (5,681m) after 5-6 hours. Watch the sunrise and take in Mawenzi Peak from there. Then it's 2 hours west around the crater rim to Uhuru Peak (5,895m) at or just after sunrise. After photos of the glaciers, you'll retrace back to Stella Point (5,739m) and descend scree slopes to Barafu Camp (4,680m). Brief stop, then down to Millennium Camp (3,950m) for your final night. Total trek time: 14-16 hours.
- Meals
- Breakfast (Hot tea and biscuits around 11:30 PM)
Included Activities
- Summit attempt up Kibo slopes
- Trek to Gilman's Point (5,681m)
- Trek to Uhuru Peak (5,895m)
- Return trek to Stella Point
- Descent to Barafu Camp
- Trek to Millennium Camp
Optional Activities
- Alternative return route via Gilman's Point to Horombo Hut using Marangu Route (offered by some operators)
Landmarks Hans Meyer Cave Gilman's Point Uhuru Peak Mawenzi Peak Stella Point Barafu Camp Millennium Camp - Day 10
Millennium Camp to Mweka Gate
A short walk through dense rainforest takes you from Millennium Camp (3,950m) down to Mweka Gate (1,640m). You'll sign out with park authorities who hand over your official certificate—green if you hit Gilman's Point, gold if you reached Uhuru Peak. The traditional next step is tipping your guide and porters before heading back to Moshi.
- Meals
- Breakfast, Lunch
Included Activities
- Hike through montane rainforest to Mweka Gate
- Park sign-out procedures
- Receive official certificate
Landmarks Millennium Camp Mweka Gate - Day 11
Moshi to Departure
Your final morning in Moshi. Transport will be arranged to get you to the airport whenever your flight departs.