


Itinerary
- Day 1
Moshi
You'll arrive in Moshi where your driver meets you and handles all your luggage before taking you to the hotel. Once you check in, the Viva Africa Tours team walks you through an orientation covering the route and trekking strategy. They'll inspect and adjust your hiking gear, and you'll spend the rest of the day getting ready for Kilimanjaro.
Included Activities
- Airport transfer
- Orientation session with Viva Africa Tours team
- Hiking gear inspection and adjustment
- Day 2
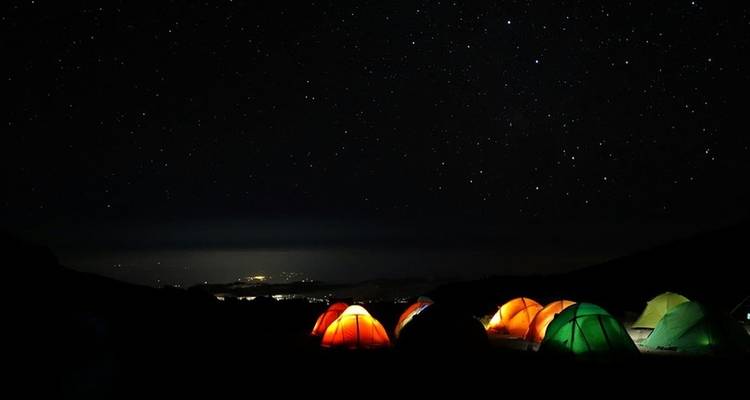
Moshi to Mti Mkubwa Camp
After breakfast at the hotel, you'll drive 3 hours west to Londorossi Park Gate, passing through Sanya Juu and other native villages. You'll register with Kilimanjaro National Park and meet your support crew. Then you trek 7 km through rainforest where Black and White Colobus Monkeys, elephants, and buffalo show up sometimes. You'll climb 450 m to reach Mti Mkubwa Camp at 2,750 m/9,022 ft.
- Meals
- Breakfast (Hearty breakfast at the hotel)
Included Activities
- Drive to Londorossi Park Gate
- Park registration
- First trekking leg through rainforest to Mti Mkubwa Camp
Optional Activities
- Cultural experience in Boma N'gombe and Sanya Juu villages
Landmarks Londorossi Park Gate Mti Mkubwa Camp - Day 3
Mti Mkubwa Camp to Shira Camp 1
The trek takes you through the final rainforest sections before moving into Low Alpine moorland. You'll pass violet lobelias and wild plants while crossing the massive Shira Plateau, which is actually a collapsed volcanic crater. From there you continue toward Shira Ridge and reach Shira Camp 1 at 3,600 m/11,811 ft.
Included Activities
- Trek through rainforest and moorland to Shira Plateau
- Trek across Shira Ridge to Shira Camp 1
Landmarks Shira Plateau Shira Camp 1 - Day 4
Shira Camp 1 to Shira Camp 2
Today you trek across exposed moorland that doesn't see many visitors, so it feels pretty untouched. The Shira Plateau opens up and you get views of Kilimanjaro's peak before arriving at Shira Camp 2 at 3,810 m/12,497 ft. Spend the afternoon exploring the area, including Shira Cathedral with its rock formations. Your guide leads short acclimatization walks around camp.
Included Activities
- Trek across moorland to Shira Camp 2
- Acclimatization excursions led by guide
Optional Activities
- Exploration of Shira Cathedral landmark
Landmarks Shira Cathedral Shira Camp 2 - Day 5
Shira Camp 2 to Moir Camp
You'll trek east into the High Alpine desert zone where the Lemosho Route meets the Machame Route. The landscape has unique desert plants and the Shark's Tooth rock formation comes into view. You reach Lava Tower and continue with gradual altitude gain to help acclimatization. By evening you're at Moir Camp at 4,200 m/13,779 ft, tucked behind the Lent Hills, where you'll have a hot meal.
Included Activities
- Trek through High Alpine desert zone to Lava Tower
- Trek to Moir Camp behind Lent Hills
Landmarks Shark's Tooth Lava Tower Lent Hills Moir Camp - Day 6
Moir Camp to Buffalo Camp
You wake up and have breakfast before climbing out of Moir Valley. There's a short detour to the top of Lent Hills for the views, then you rejoin the Northern Circuit trail. The terrain rolls up and down as you skirt Kibo's northern slopes. You arrive at Buffalo Camp, a large campsite with views stretching to the Kenyan plains.
Included Activities
- Trek from Moir Valley via Lent Hills summit to Buffalo Camp
Landmarks Buffalo Camp - Day 7
Buffalo Camp to Rongai Third Cave Camp
The morning brings a short climb to Buffalo Ridge's summit. After lunch you head east through High and Low Alpine terrain with increasingly sparse vegetation. You'll circle the northern slopes to reach Rongai Third Cave Camp. By now your body's adjusted to the higher altitude.
Included Activities
- Climb to Buffalo Ridge summit
- Trek through High and Low Alpine scenery to Rongai Third Cave Camp
Landmarks Buffalo Ridge Rongai Third Cave Camp - Day 8
Rongai Third Cave Camp to School Hut
This is your final preparation day before the summit push. You trek up and over The Saddle, a lunar-looking landscape between Kibo and Mawenzi peaks. Head southwest to School Hut at 4,800 m/15,748 ft where you'll rest. Your guides check all your gear and supplies thoroughly before the early morning start.
Included Activities
- Trek over The Saddle to School Hut
- Gear and supply check by guides
Landmarks The Saddle Kibo Peak Mawenzi Peak School Hut - Day 9
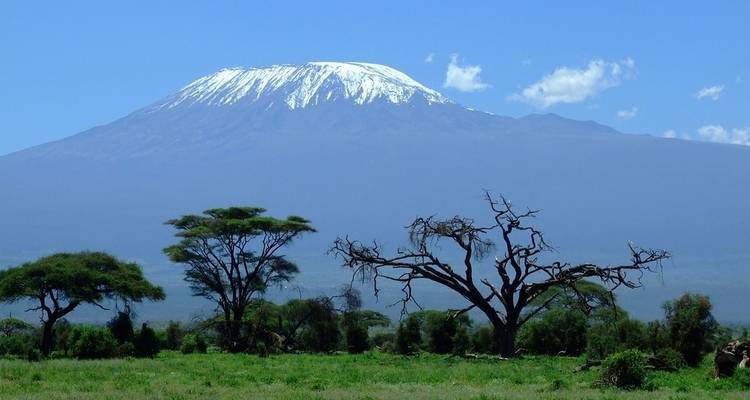
School Hut to Mount Kilimanjaro Summit to Mweka Camp
Your alarm goes off early in the dark. You trek with your guides toward Kilimanjaro's main crater rim at Gilman's Point. After a brief rest you make the final push, passing ice cliffs and glaciers. You reach the summit in time for sunrise and share this moment with your team before descending via the Mweka Route to Mweka Camp.
Included Activities
- Pre-dawn trek to Gilman's Point
- Final summit push to Mount Kilimanjaro peak
- Descent via Mweka Route to Mweka Camp
Landmarks Gilman's Point Mount Kilimanjaro Summit Mweka Camp - Day 10
Mweka Camp to Mweka Gate
The final hike down to Mweka Gate is short. Viva Africa Tours presents you with a Gold Summit Certificate and celebrates what you've accomplished. Your drivers wait nearby to drive you back to the hotel for a hot shower, a real bed, and fresh clothes.
Included Activities
- Final trek to Mweka Gate
- Gold Summit Certificate presentation
Landmarks Mweka Gate - Day 11
Moshi to Airport
Your driver picks you up and takes you to the airport for your flight home, ending your Mount Kilimanjaro Northern Circuit trek.
Included Activities
- Airport transfer

